Druid Data Service Installation
Druid Data Service is Druid’s data storage used to persist entity records created and managed within the Druid AI Platform simplifying records authoring. authors can further use these records in NER training and in other different contexts.
This document describes how to install Druid Data Service on your premises.
The following tokens used within this document are supposed to be replaced with their real values before being used:
|
Token |
Description |
|---|---|
|
|
The machine which hosts Druid Connector Host service. |
|
|
The machine which hosts Druid Data Service. It can be the same machine that hosts Druid Connector Host service as long as all requirements are fulfilled. |
|
|
The TCP port on which Druid Data Service will be accessed. |
|
|
Your tenant name assigned by Druid team. |
Prerequisites
- Your tenant is already configured in Hybrid mode deployment.
- Make a request to Druid Tech Support to activate the Druid Data Service feature.
- You will provide your tenant identifier,
{{TENANT-NAME}}.
Hardware requirements
|
Item |
Testing Environment |
Production Environment |
|---|---|---|
|
CPU count |
1 |
2 |
|
CPU Type |
Proc Intel i7 gen 8 min or equivalent Xeon. |
|
|
RAM |
4 GB |
8 GB |
|
Storage Type |
Min 500 IOPS. |
|
Software requirements
|
Tool |
Install instructions |
Type |
|---|---|---|
|
Notepad ++ |
Recommended |
|
|
Mongo DB |
Mandatory |
By default, MongoDB is installed without any secured access, which means that the database can be viewed or modified by anyone who has network access to the machine running the MongoDB service. To set up security for your MongoDB installation, see Configure secured access to your MongoDB database.
Networking requirements
|
Source |
Destination |
Protocol | Port |
Function |
Used at |
|---|---|---|---|---|---|
|
|
|
https http |
{{DATASERVICE- PORT}} |
Feature DataService |
Utilization |
|
|
|
tcp |
27017 |
Data persistence in Druid |
Utilization |
|
|
|
https |
443 |
Platform stored in Azure |
Utilization |
This section describes how to install Druid Data Service using the Connector Host installer kit.
Step 1: Download Druid Connector Host Installer
On the {{DATASERVICE-SERVER}} machine, download the Druid Connector Host Installer:
- Access the Druid Portal using an admin account and from the left menu select All Settings > Download binaries.
- Expand the latest version and download the zip file.
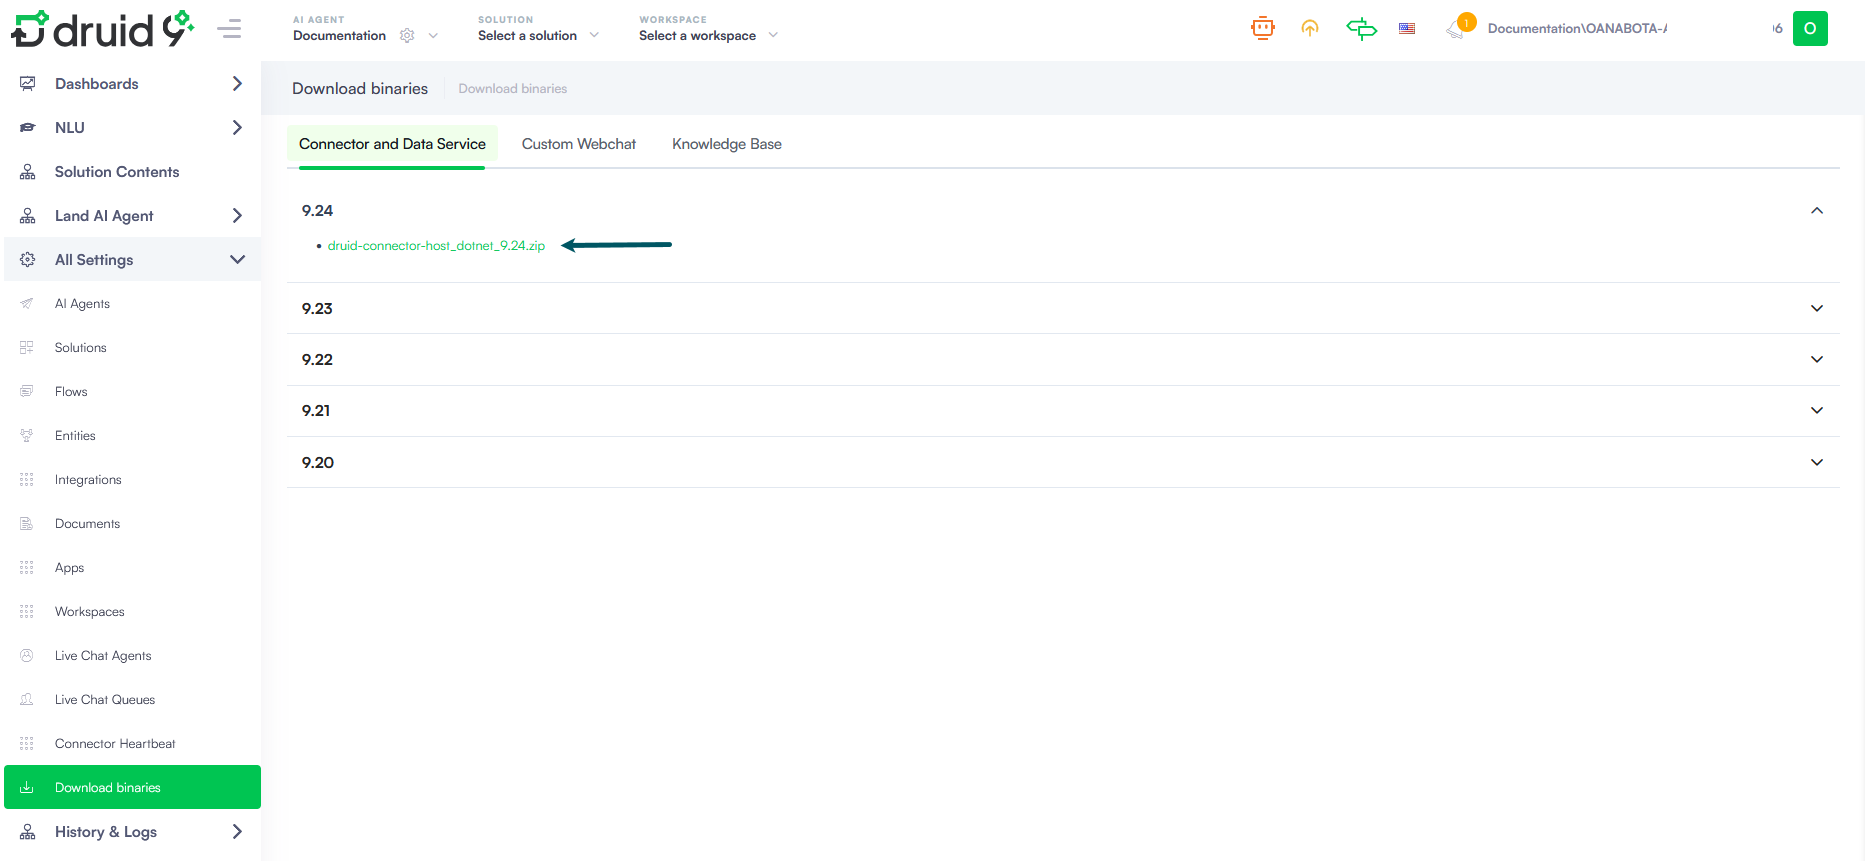
The file is downloaded in your default download folder.
Step 2: Unzip the downloaded file
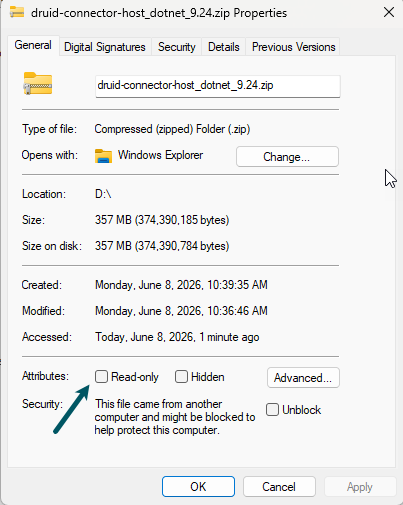
Usually, the URL security zone might prevent the downloaded file execution. Right-click on the file and click Properties, untick the Read-only checkbox, click Apply, confirm the changes and then click OK. Unzip the downloaded file into the installation folder, e.g. D:\Druid.
Step 3. Install Druid Data Service
Go to the folder Druid Connector installer and double-click on Druid.ConnectorHost.Installer.exe.
The installation wizard opens. Select Data Service.
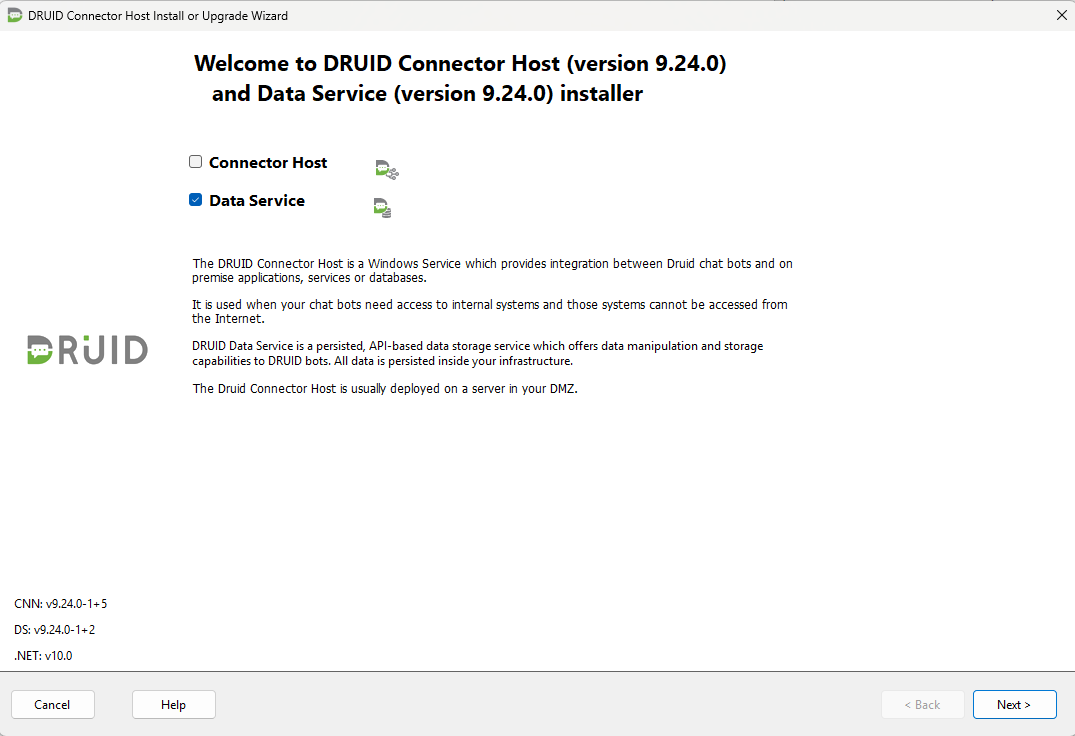
Click Next.
Select Install a new Data Service instance.
Click Next.
Provide Druid Data Service installation parameters or import the settings by clicking the Import settings button and uploading the appsettings.json file from an older Druid Data Service installation folder.
|
Parameter |
Description |
Example |
|---|---|---|
| Data Service | ||
| Instance name | The name of the Data Service instance | test-DS |
| Installation folder | The link of the folder where the Data Service will be installed. | E:\Druid\DataService_test-DS |
| Connections | ||
|
MongoDB
|
The connection string to the MongoDB database. |
mongodb://localhost:27017/ |
| Druid Portal API | ||
|
URL |
The Druid AI Platform url. |
https://{{environment }}.druidplatform.com/
|
| Tenant | The name of your Druid AI Platform tenant assigned by the Druid team. | documentation |
|
Username
|
A dedicated Druid Portal user ( in your tenant) with Druid Backend API permissions. We recommend you to use the same credential as the one used for Druid Connector Host installation. |
|
|
Password
|
The password of the dedicated Druid Portal user. |
|
| Configurations | ||
|
Local port number |
The http port for communicating with Data Service. |
5105
|
| Query ResultSet Max Limit | The maximum number of records that can be transmitted through Druid Data Service. We recommend you to set the value to minimum 100.000. | 100000 |
| Service settings | ||
| Local System / User account |
The credentials of the Windows user under which the Data Service will run. |
|
| Client Rate Limiting | ||
| Period/Limit |
Control the rate of requests sent to Druid Data service to prevent DDOS attacks. We recommend you to leave the default limits. |
|
Click Next, then click Start.
After the Data Service installation completes, click Exit.
Step 3. Review and upgrade Druid Data Service
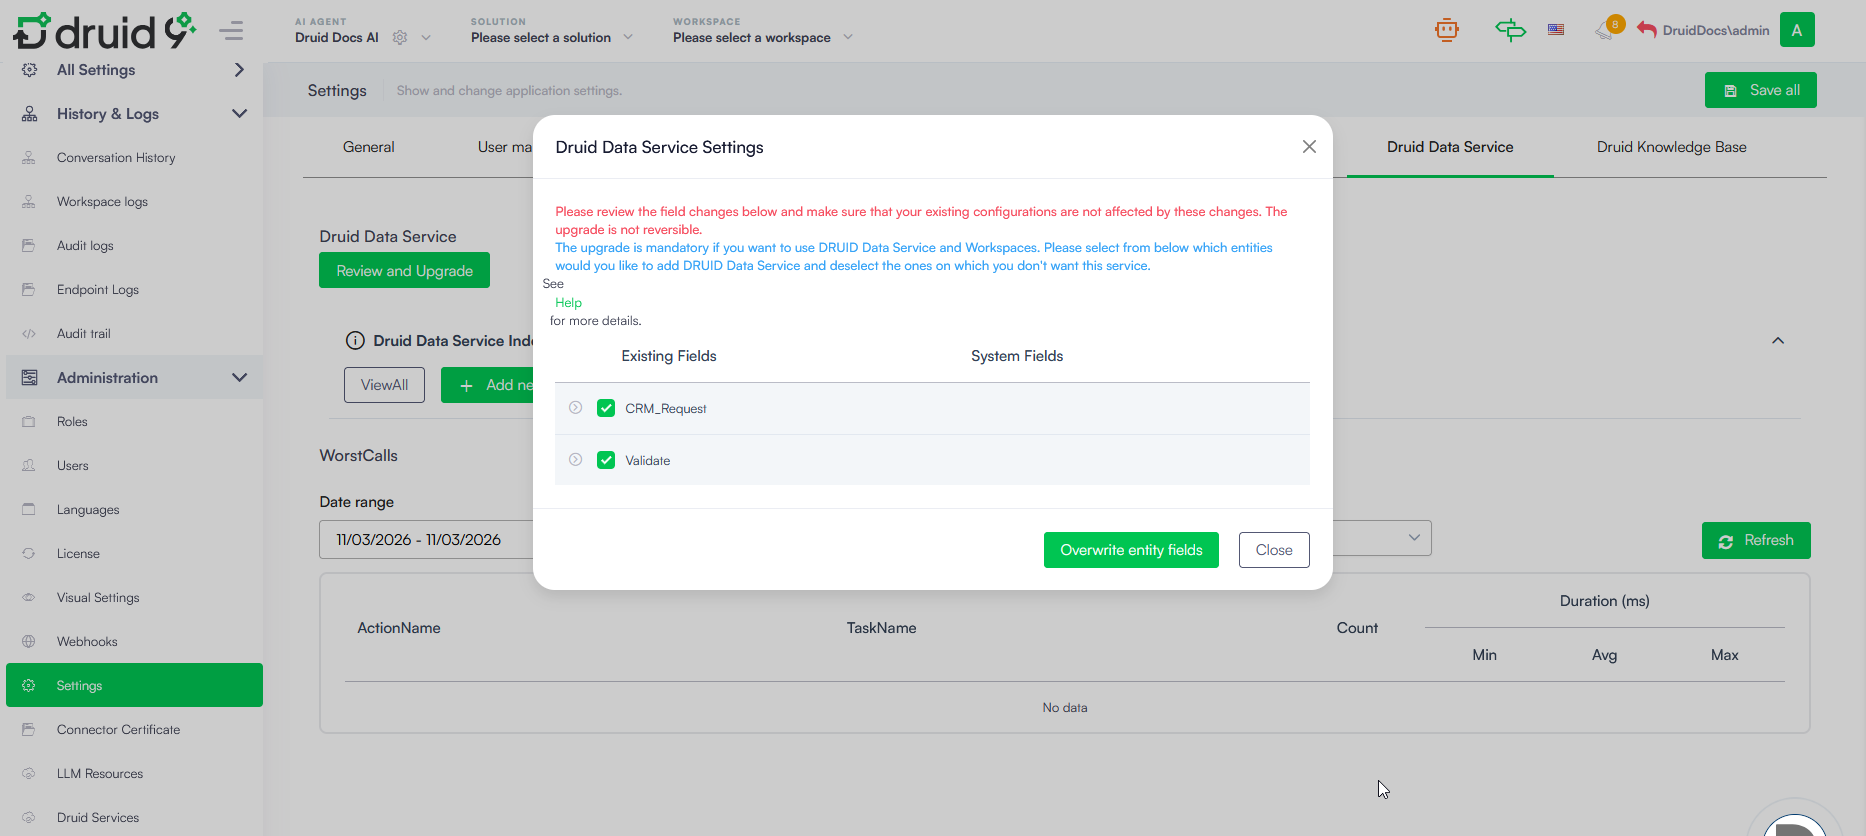
Go to Administration > Settings. Click the Druid Data Service tab and click the Review & Upgrade button.
Druid screens all existing entities across all AI Agents on your tenant and detects the entities that have fields for which the field type is incompatible with the required system field type. You can go through the list and click on entity (entities) to see which field types were found incompatible.
The following Druid system fields are automatically populated on entity and entity field creation; therefore, a specific field type is required by Druid.
| Druid System Field | Druid field Type |
|---|---|
| Id | String |
| CreatedByUserId | String |
| CreatedOn | DateTime |
| ModifiedByUserId | String |
| ModifiedOn | String |
| OperatedByBotId | String |
Click the Overwrite entity fields button at the bottom of the pop-up to overwrite your existing field types to the ones required by Druid.
At the top-right corner of the page, click the Save all button.
Use Druid Data Service Connector to manage entity records within the conversational flows.
Step 4. Configure secured access to your MongoDB database
By default, MongoDB is installed without any secured access. This section describes how to set up security for your MongoDB installation.
netsh advfirewall firewall add rule name="Open mongod port 27017" dir=in action=allow protocol=TCP localport=27017To configure security in MongoDB you can use mongosh or compass.
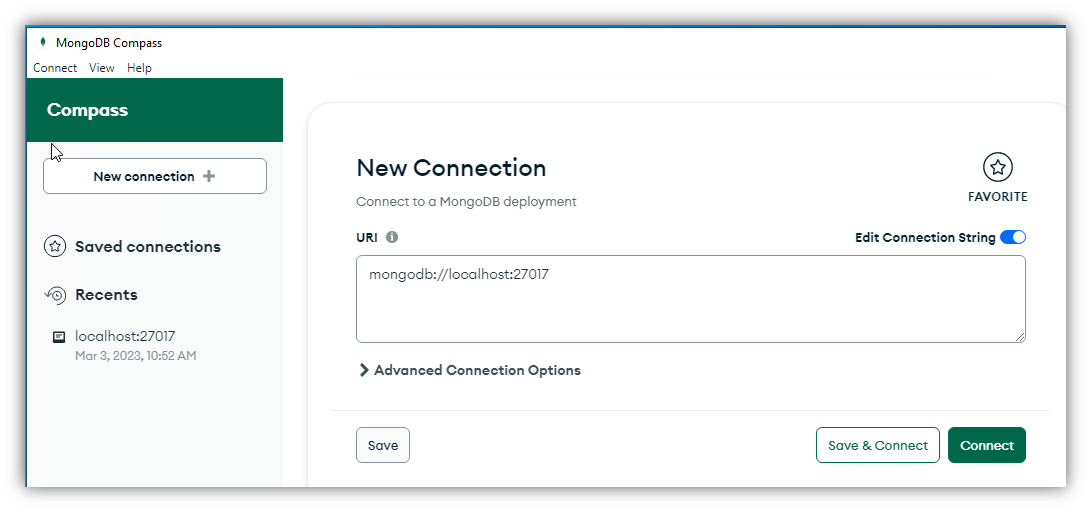
This section describes how to configure security in MongoDB using the compass tool:
- Access compass and click the Connect button
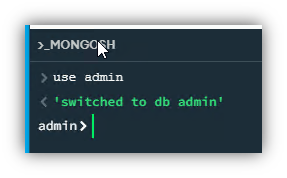
- At the left-bottom of the Compass window, click on >_MONGOSH.
- Change the database to admin by typing
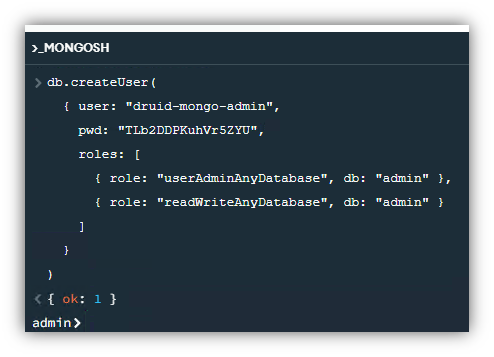
use adminand pressing ENTER. - Create the user by typing the text below and replacing
{{MONGOADMIN}}and{{MONGOPASS}}with the MongoDB credentials (user and password). - Press ENTER. The response must be
{ ok: 1 }. - Edit the file C:\Program Files\MongoDB\Server\6.0\bin\mongod.cfg by setting up the following configuration.
- Restart the MongoDB service.

db.createUser(
 { user: "{{MONGOADMIN}}",
   pwd: "{{MONGOPASS}}",
   roles: [
      { role: "userAdminAnyDatabase", db: "admin" },
      { role: "readWriteAnyDatabase", db: "admin" }
   ]
 }
)
security: authorization: enabled

net:
port: 27017
bindIp: 127.0.0.1,{{HOST-NAME}}{{HOST-NAME}} with the name of the Windows computer which runs the MongoDB service.To connect to MongoDB, the new connection string is:
mongodb://{{MONGOADMIN}}:{{MONGOPASS}}@localhost:27017For example, mongodb://druid-mongo-admin:TLb2DDPKuhVr5ZYU@localhost:27017.
Step 5. Configure Database User Privileges for Data Service Indexes
While the MongoDB administrator handles overall database access, the specific database user account configured for Druid Data Services requires targeted privileges to support advanced index operations.
To fully use the Index details and Create Index features within Dataservice-Mongo, the application user must have rights to the following seven actions: createIndex, find, indexStats, insert, listIndexes, remove, and update.
Assign the predefined MongoDB role readWrite, which includes these defaults. Depending on whether you are modifying an existing user or creating a new one, execute the appropriate command block in the MongoDB shell:
- To grant rights to an existing user (mongoDataServiceUser):
- To create a new user with these rights:
- To verify the assigned user rights:
use admin
db.grantRolesToUser("mongoDataServiceUser", [ { role: “clusterAdmin", db: "{environment}Tenant{tenantId}Store" } ])use {environment}Tenant{tenantId}Store
db.createUser({
user: "mongoDataServiceUser",
pwd: "<password>",
roles: [ { role: "readWrite", db: "{environment}Tenant{tenantId}Store" } ]
})use admin
db.getUser("mongoDataServiceUser", { showPrivileges: true })Variable Definitions:
- {environment} – The Druid DataService environment variable (defaults to an empty string '').
- {tenantId} – The Druid Tenant ID.